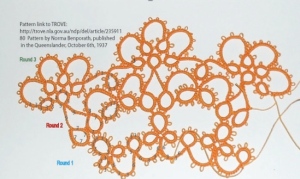
Remember the time I tatted Norma’s card suit motifs? It’s ok if you don’t, I’ve linked the blog post about it here. Last weekend I had my sewing machine out to do some mending. I decided to try attaching a tatted insert into a piece of material, in preparation for making the card cloth with the motifs. I love how in the older books the authors give quite thorough instructions to measure and sew the fabric for these effects. I used Norma Benporath’s instructions, as this is where the motif pattern was (I also used the TROVE pattern, but found some inconsistencies- so ended up back with the printed page in this book). Now, please remember here that I am not a person who usually sews. I can run straight stitches and can count on one hand the number of button holes I have made – so trying this technique of inserting the tatting into a cloth was an adventure! Also, I have used dark threads through out this practice so I (and you) could see exactly what was happening, how neat it would be and if I wanted to use coloured threads for the ‘real’ table cloth.
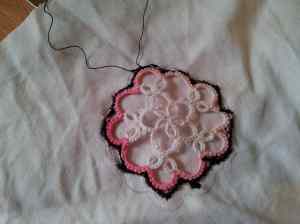
First, I needed a test piece of fabric, so a section of an old sheet worked well here.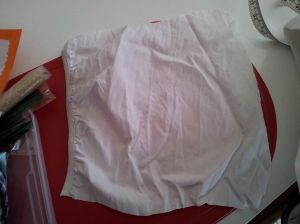 Second, I needed a motif to test this on. I used a motif I made a long time ago and never gave away.
 Norma’s next instruction is to trace around the motif onto the fabric, and tack into place.
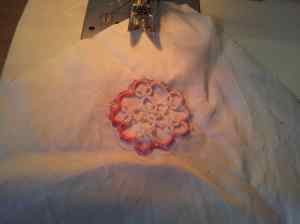 Now, at this point it took me a little while (30 mins) to figure out how to button hole on my machine. I also learned about width and tension of stitches….and think I may need a service for my machine 🙂 But, here we go…somewhat successful button holes. I also realised at around the 30 minute mark that I really just needed to go in one direction for this attachment, so I didn’t spend any longer fiddling with making an actual button hole.
 I took a deep breath and used my new button hole technique to follow the outside of the motif and pencil line. It is a bit wobbly in places, but all bar 3 picots were caught in the thread. I think with white thread I wouldn’t have noticed the picots that didn’t catch as easily. Then I let out my deep breath 🙂
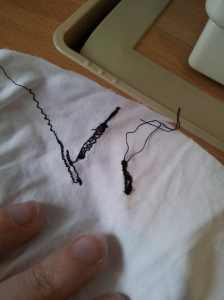
 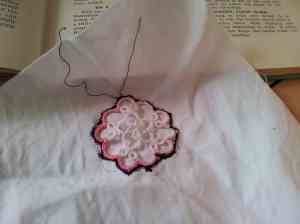 Here is what the back looked like, decidedly wobbly:
 And a close up:
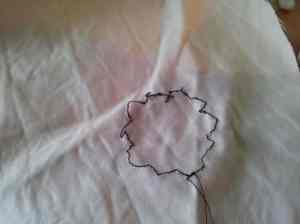
 Norma’s next instruction was to cut away the back of the fabric, close to the sewn edge. ( I took for granted I didn’t want to cut through the motif 🙂 )
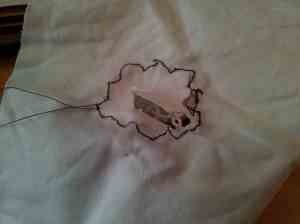 Here is the cut back, you can see through the motif 🙂
 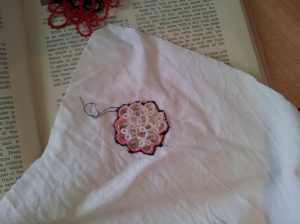 A bit more fine cutting work:
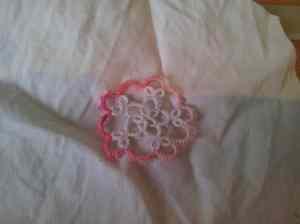
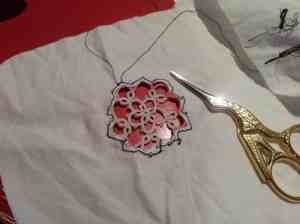 And from the front it looks pretty good:
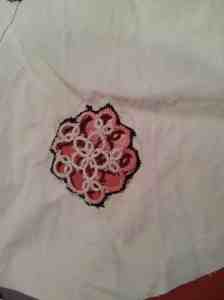 So I felt pretty happy my first try looked pretty good, and that Norma’s instructions were very easy to follow. Now to the dilemma, here is one of the 2 black motifs for the card cloth. The others are red. The material I envisioned and have purchased is white. I am thinking I should match the thread for the joining to the colour of the motif, not the colour of the cloth. I wonder what you think?
 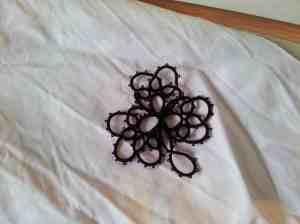 As always,
Happy tatting
Fiona T